Once the JW Platform integration has been set up, you then can submit videos for closed captions. There are two ways to upload JW Platform videos: (i) from your 3Play Media account or (ii) directly from your JW Player account. This article explains the first way.
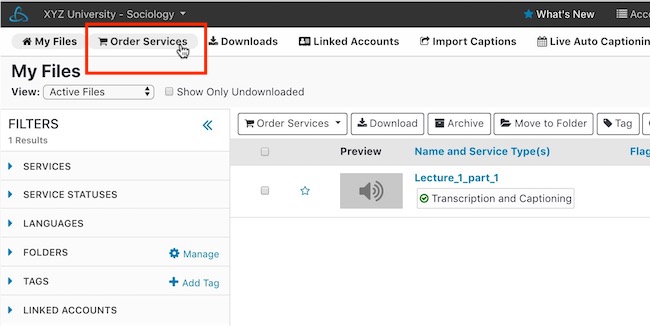
Step 1- Click Order Services
After logging into your 3Play Media project, click on Order Services located in the upper left-hand corner of the page.
Step 2- Choose Service
Select the default service English Transcription and Captioning to have 3Play Media create your captions from scratch. If you already have a transcript that you would like 3Play Media to sync with a video asset, select Alignment. Spanish-Latin American Transcription and Captioning, is also available.

See more information on 3Play Media's Transcript Alignment Service
Spanish-Latin American Transcription and Captioning, is NOT a translation service. This service is used for Spanish content, that needs Spanish-Latin American Transcription and Captioning.
See more information on 3Play Media's Spanish Transcription Service
Step 3- Select Turnaround Time
Next set your turnaround service level and click Continue.

See more information on turnaround service levels
Step 4- Select linked JW Platform account
Click on Linked Accounts.and from the drop-down menu that appears, select your linked JW Platform account.

Step 3- Select videos to upload
After selecting the linked JW Platform account you will directed to a feed of all of your available JW assets. Select the videos from the feed of the thumbnails that you would like to caption by checking the box to the left of the thumbnail.

The number of videos displayed on a page can be changed from 5, 10, 25, 50, or 100 videos. By default 10 are displayed.
Step 4- Click Process
Click the Add Files button located above your list of JW videos. You will see a count of the number of videos selected.

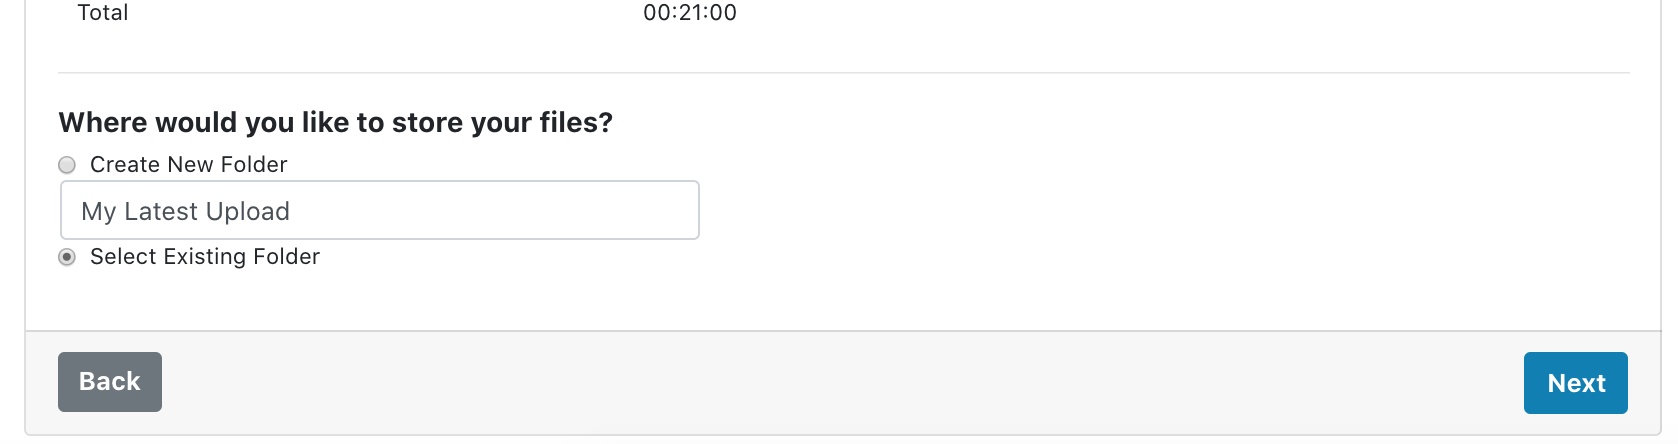
Step 7- Select folder location
Select an existing folder to upload your content to or create a new folder for this batch.
Once a folder has been selected click Continue.
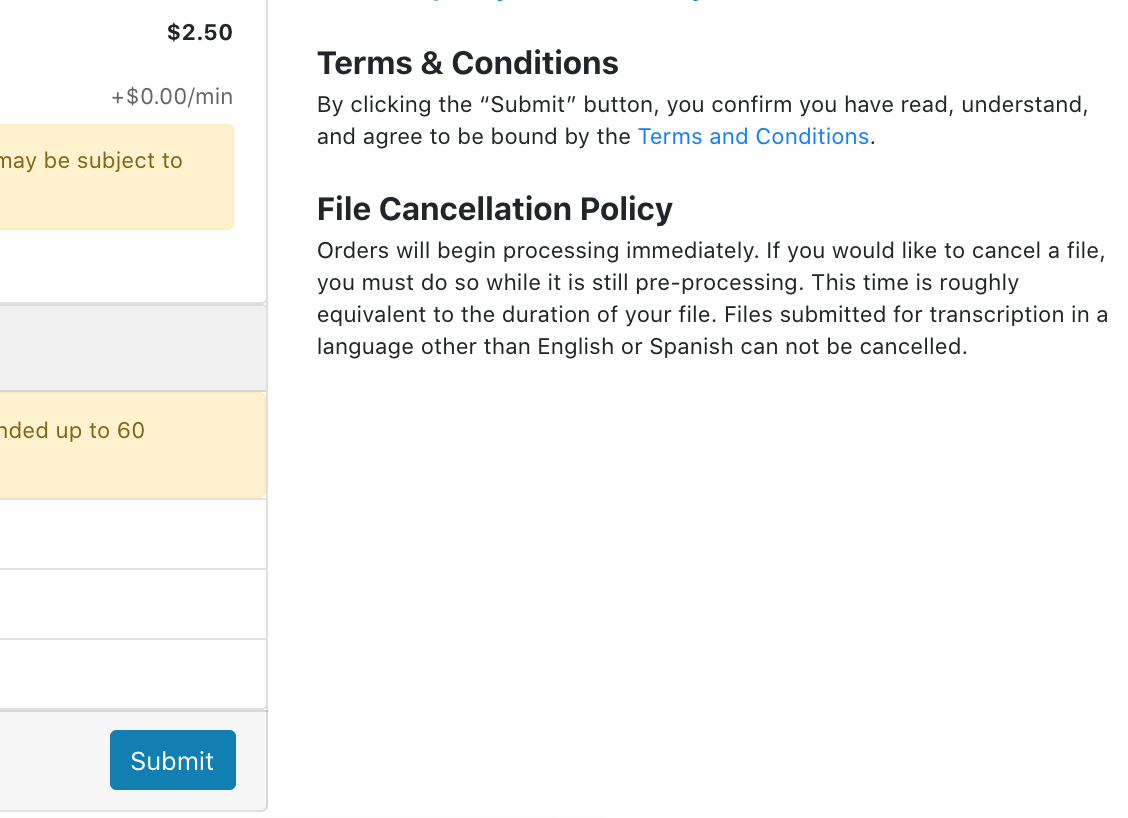
Step 8- Review Order and Cancellation Policy
Review your order summary.
If you notice in your summary you would like to if you would like to change the destination folder, turnaround time, service type, or selected media files please go back and make the desired changes BEFORE clicking Place Order
Read the cancelation policy and check the box acknowledging that you have read the policy.
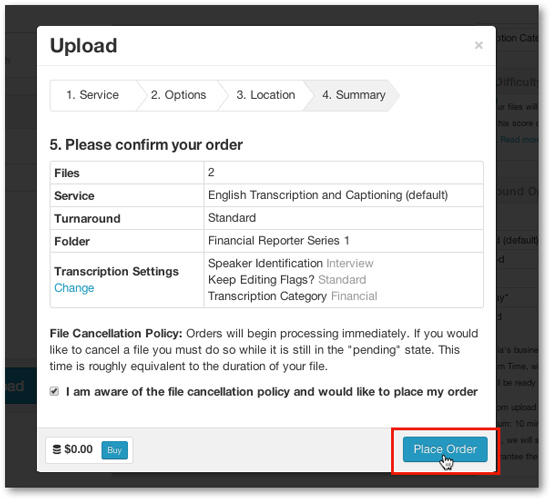
Step 9- Place Order
Once you have reviewed your order checked the box acknowledging the cancelation policy, click Place Order. Once Place Order is clicked your files will begin uploading and will start in the Pending State.
If Postback Captions was set to ON when the integration was set up, the closed captions will automatically be sent back to the videos residing on JW Platform upon completion of the transcription process.
If Postback Captions was OFF click here to learn how to manually post back the closed captions