Step 1 - Log in to 3Play Media Account
Open a new browser window and log into your 3Play Media account.

Step 2 - Navigate to Linked Accounts page
Select Linked Accounts from the action menu.

Step 3 - Select Warpwire
Click the New Linked Account button and select Warpwire from the list of video platforms and lecture capture systems.
- Give your Warpwire account an ( optional ) nickname
- Click "Create Account".
Step 4 - Copy API Keys
After creating your Warpwire account, click "Edit" to view the settings for your linked account in 3Play. This will display an API Key and Secret Key to use with Warpwire.
- Copy the API keys, to be used with your Warpwire account.

Step 5 - Navigate to Your Warpwire Account
Log in to your Warpwire account. Navigate to the Warpwire Admin Tool, first click your username in the upper-right corner of the screen, then click "Warpwire Admin."

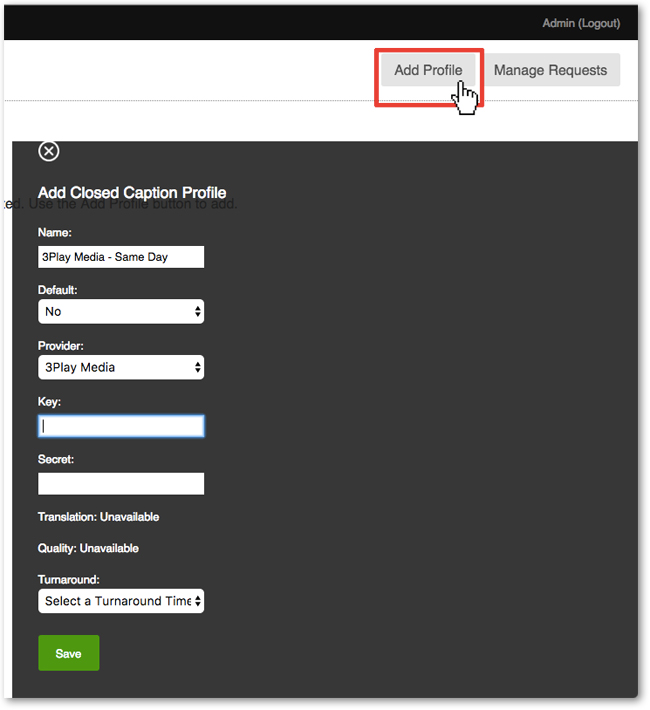
Step 6 - Add Closed Caption Profile
Click the Add Profile button. Select 3Play Media as the provider, then add the API Keys that were acquired from Step 4.
- A new profile must be added for each 3Play Media turnaround level. These turnaround levels are: Standard, Expedited, Rush, and Same Day. Make sure to select the proper turnaround for each profile that is created. Once complete, there should be 4 profiles.
-
IMPORTANT: By the end, there should be 4 profiles, and they should read as follows:
- 3Play Media - Standard
- 3Play Media - Same Day
- 3Play Media - Rush
- 3Play Media - Expedited
- Make sure the API Keys have been added to each profile, and select the proper turnaround for each profile.